
Today I will reveal the Big Thing
Scroll down for details
Ready?

HA HA HA HA!
You fell for clickbait. it works.
However in all seriousness the “Big Thing” will be arriving sometime in the next week or so. Here is another clue. Its very rare.
Today I will reveal the Big Thing
Scroll down for details
Ready?
HA HA HA HA!
You fell for clickbait. it works.
However in all seriousness the “Big Thing” will be arriving sometime in the next week or so. Here is another clue. Its very rare.
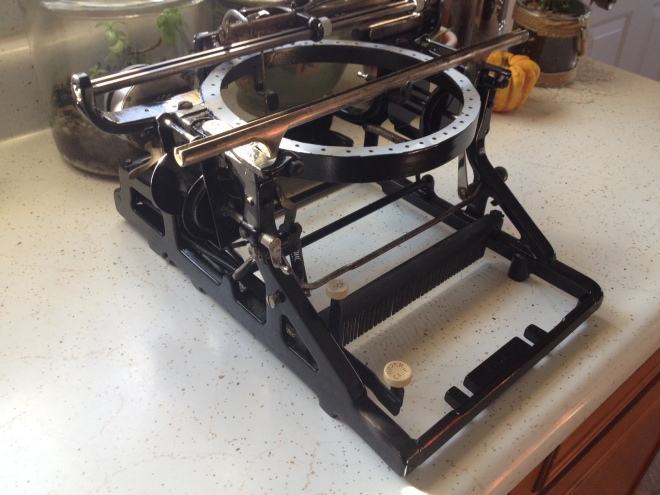
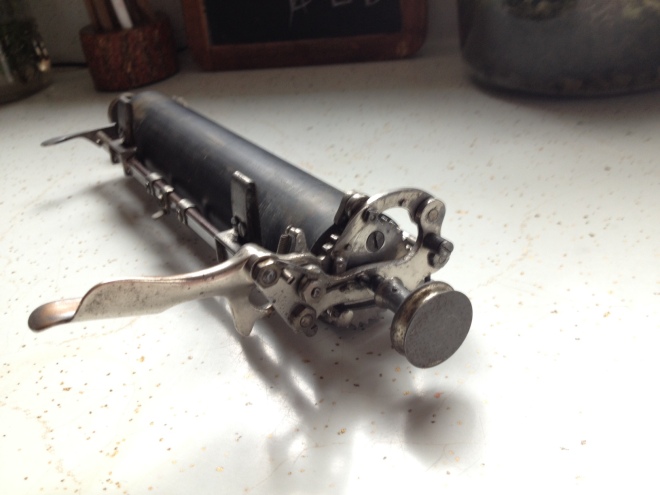
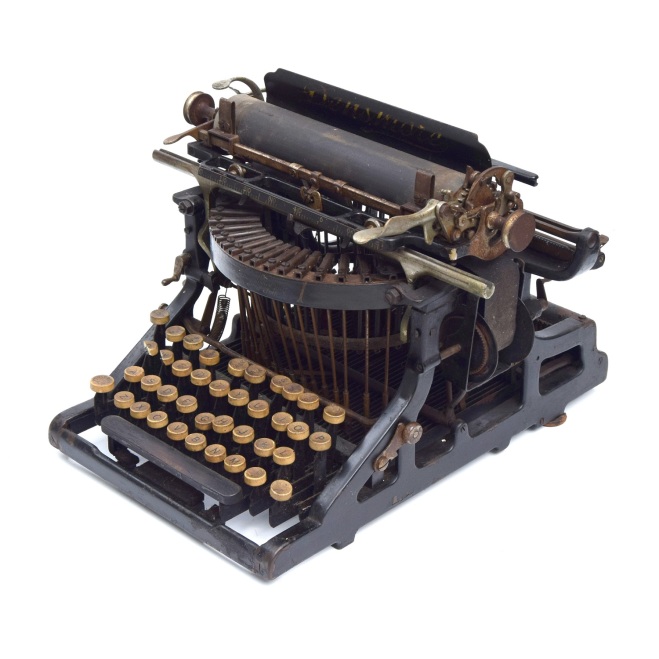
I have gotten the Densmore finished from a mechanical standpoint.
Its back together now and works well (after fiddling with the escapement)
Cosmetically there is some stuff left to be done. The main thing is decals although I am going to wait till the spring to do that as there is a spot on the back of the paper table where the black paint got messed up when drying. I also want to have the nickel plating redone at some point as well.
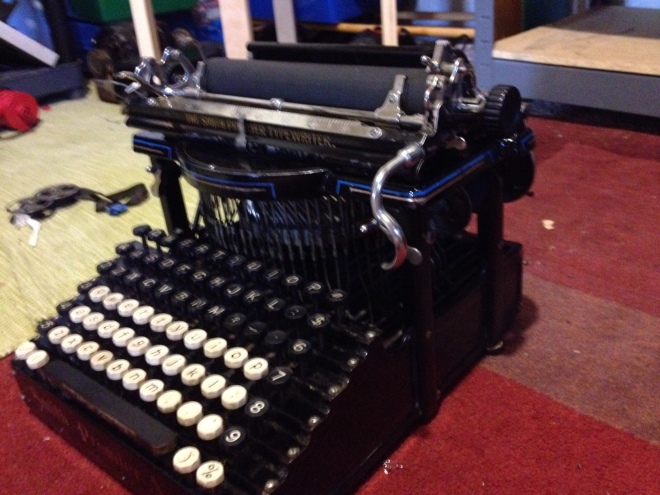
Remember this? This is the Densmore 2 I bought as a parts machine for the no 1. Turns out its pretty significant in its own right. The serial number is 1287. This is the 3rd oldest Densmore no 2 around and it most likely dates to 1892, the first year of production for the no 2. The shift key is also black. No other Densmore has a black shift key. I did take a few parts off of it were missing on the other one to complete it but other then that it is in rough but restorable condition. I was lucky enough to find a Densmore 1 through a few other collectors in rough shape with a carriage. It is a late model with the late carriage rail. I plan to make new rollers for the carriage. It will also provide the missing typeslug that this machine will need.

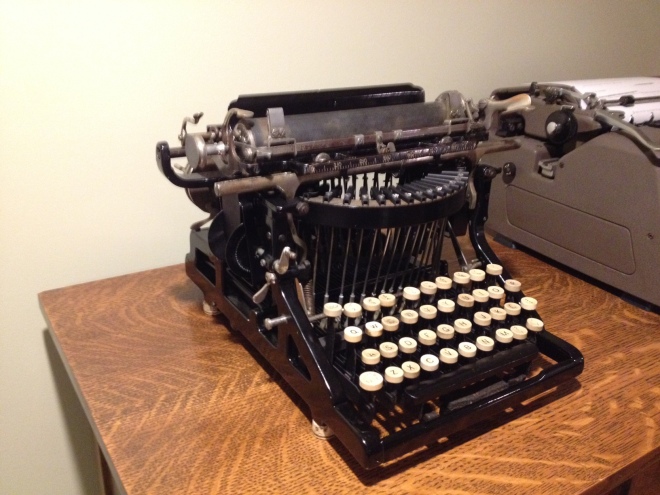
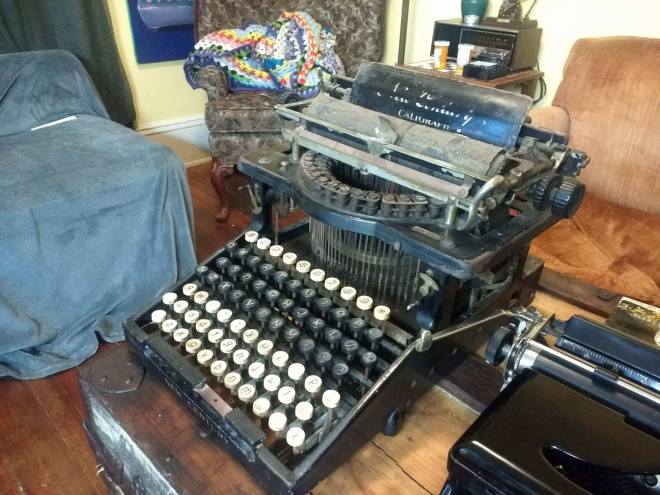
The Smith Premier 5 cleaned up well and works fine for the most part. Its the rarest machine in the collection, Oddly though is not the most valuable. that would more then likely be the Densmore 1.
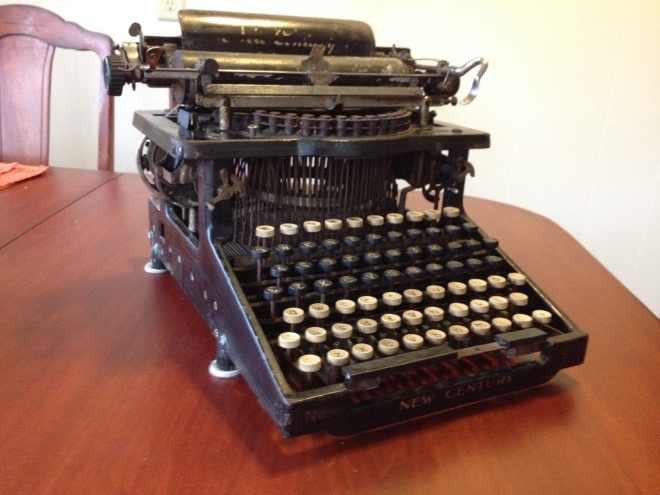
I have not really done anything with the New Century. I am mostly waiting for the spring/summer so I can restore it. Full teardown and cleaning with a repaint likely.
The Smith Premier no 10 cleaned up well, just being really dusty. however it refused to type. it turned out that the pins the u bar pivots on were bent. I took them out of the parts sp10. Then it worked but it felt very sluggish. I ended up having to cut a new hole in the mainspring to allow it to tension up.
Some machines went to new owners at Herman’s


I was able to send some parts from the parts SP2 to some fellow collectors.
There are soon to be some new acquisitions in the collection. my friend Ian Brumfield has been busy dragging rare Royal electric standards out of what has been called “The Hoard” In that house full of typewriters there is a LC Smith 5 missing a carriage that I will be getting for parts for mine as mine has a crack in the carriage support. I also saw a LC Smith Silent standard in one of the photos and plan to get that too.
However the big thing that I am working towards getting is something that I have wanted for awhile. Its old and has a unusual type mechanism.
I have gotten the frame back from the blaster.
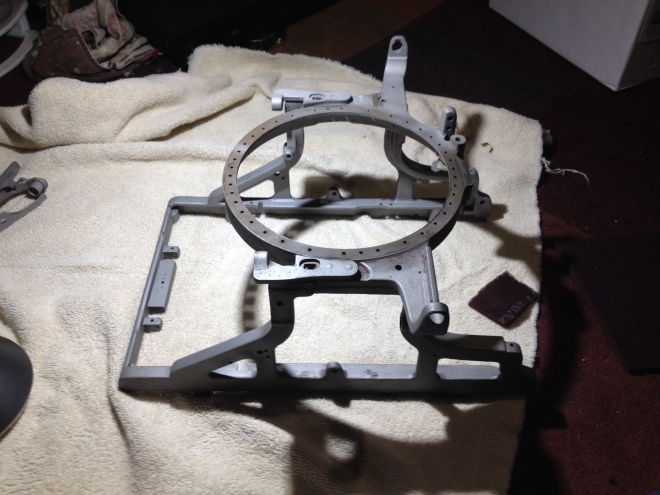
I then painted the frame with several coats of primer and then painted it with a gloss lacquer.
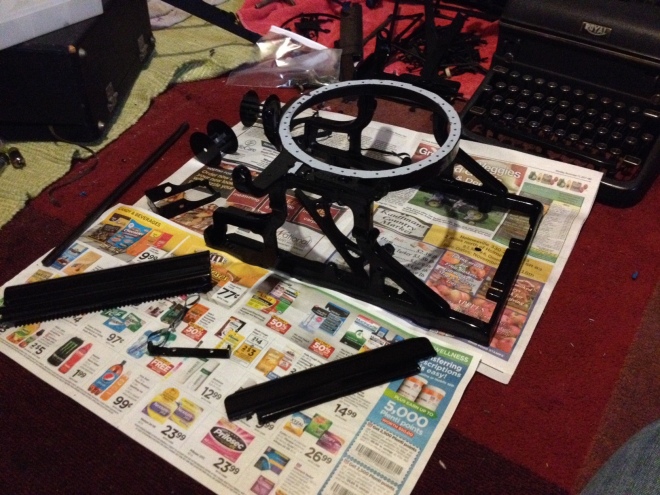
I then reassembled some of the typewriter. Some of the nickeled parts I swapped with the Densmore no 2 that I have. The nickel on that machine was better then the nickel on this one.
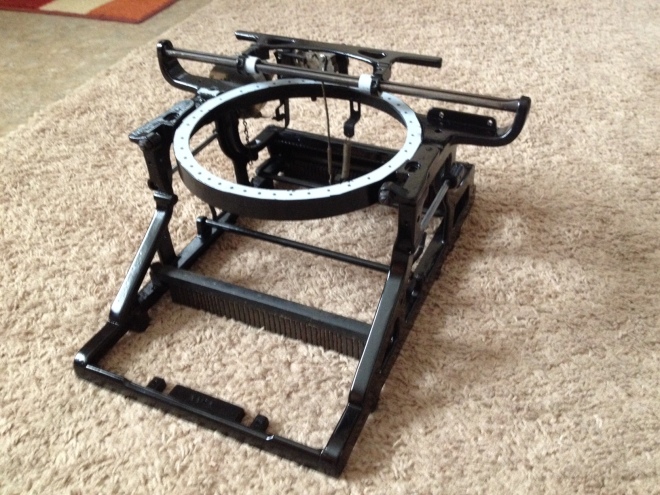
I also derusted the carriage parts with Evaporust. They look better but not as good as having new nickel. A fellow collector should be doing it for me.
Here are some photos on the progress on the Densmore.
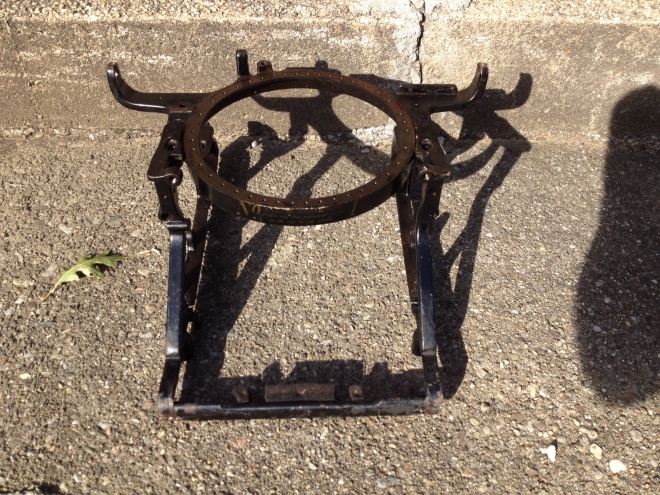
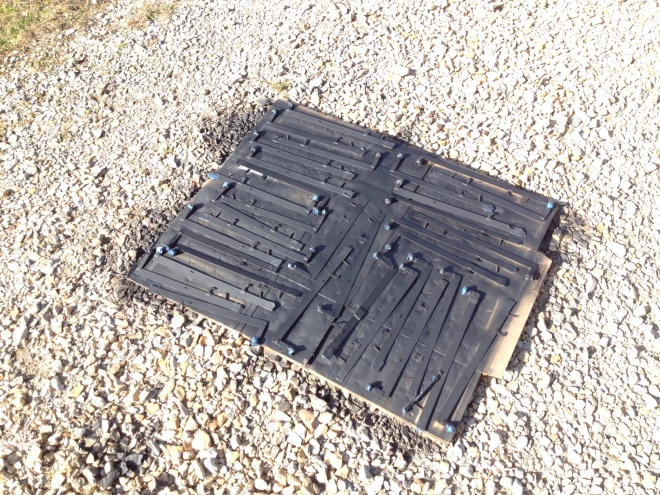
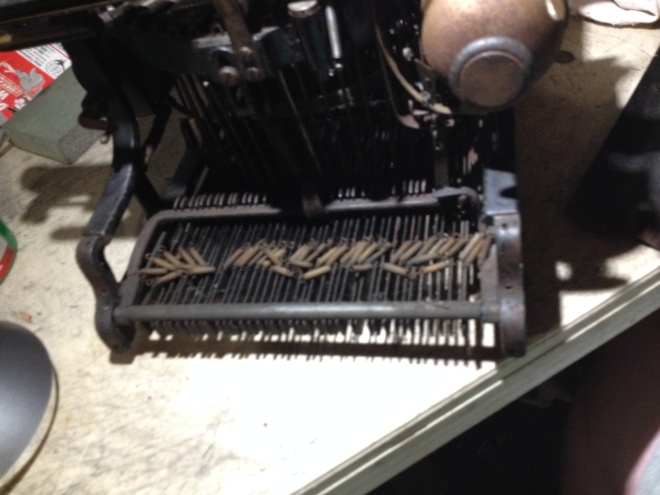
Here is the frame stripped of all parts ready for blasting.
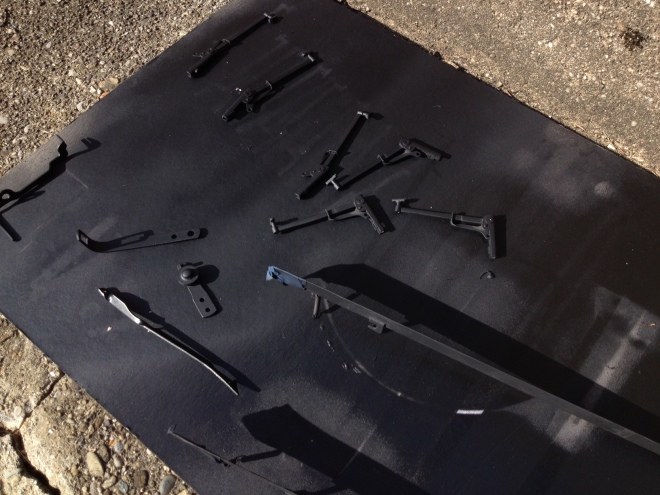
Here are some parts being painted. In my basement all 38 keylevers and all 38 typebars are laid out on towels on the floor waiting for the frame to be finished. It has not yet been blasted but I hope to get it done soon.
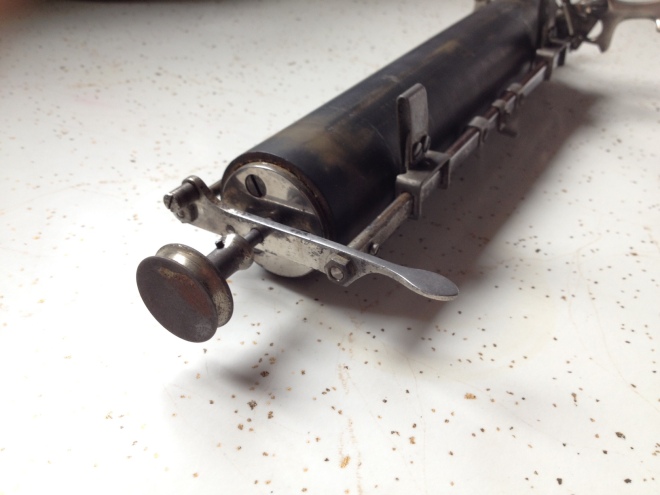
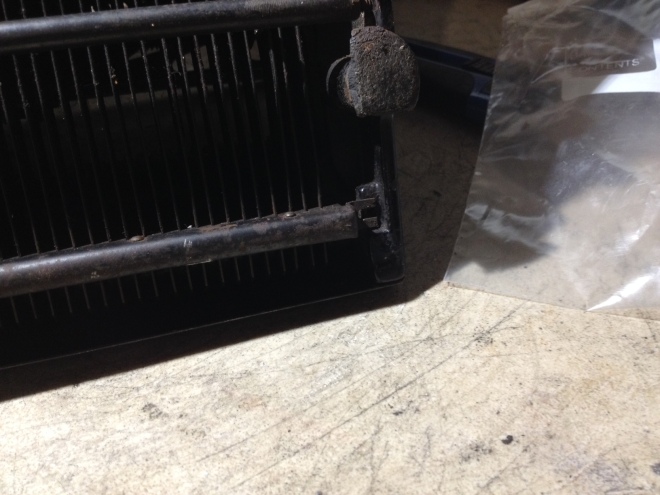
We left off with this

Remove the setscrew from this hole. Pull the crank off.
Unscrew the shaft from inside the hole where the winder went.

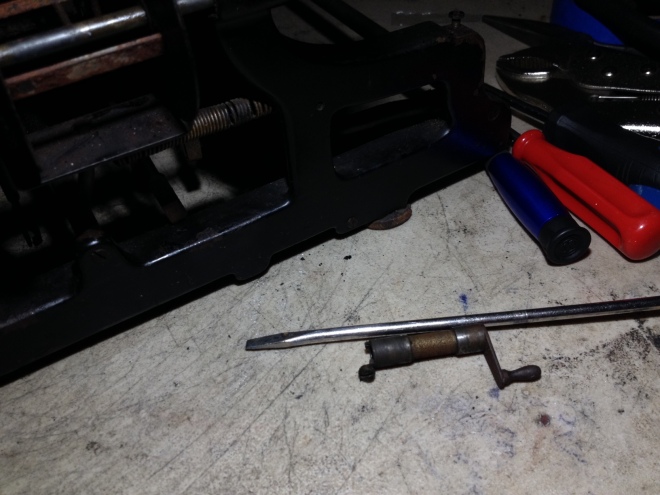
Remove shaft and ribbon spool. Repeat for other side.
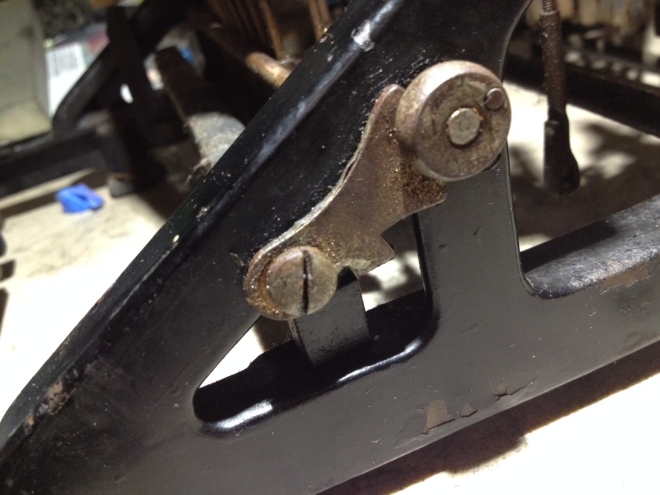
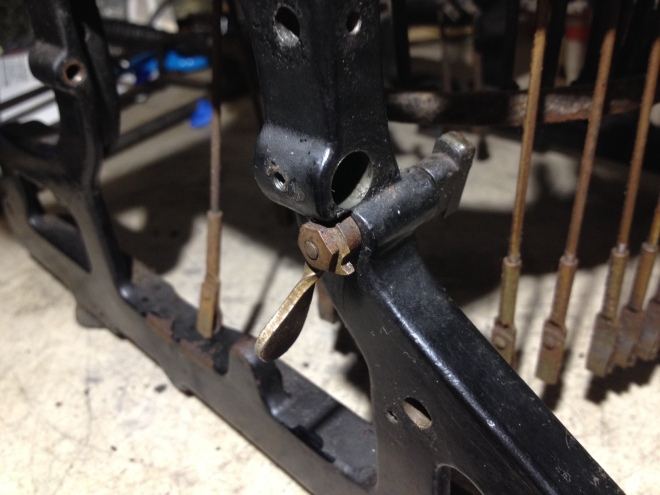
Undo the big screw below the shift lock on the ribbon reverse rod.
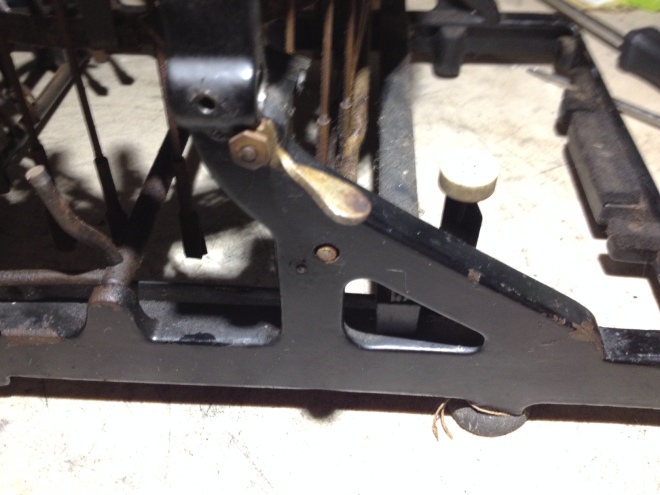
Undo the setscrew on the knob mounted to the ribbon reverse rod. Pull the knob off. Take the screw holding the triangle shaped piece off too. Remove the triangle piece.
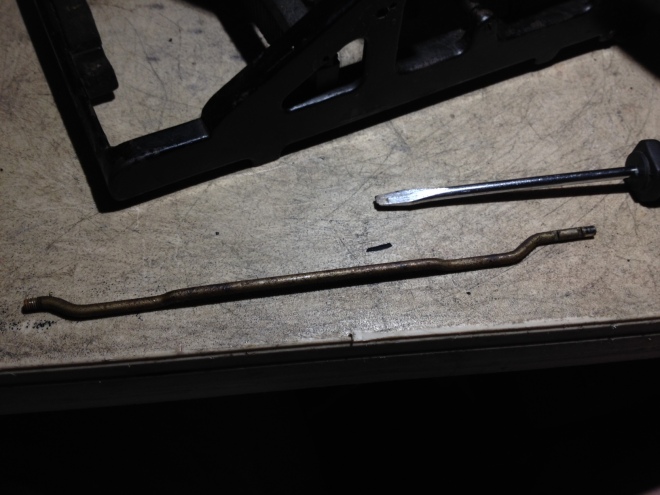
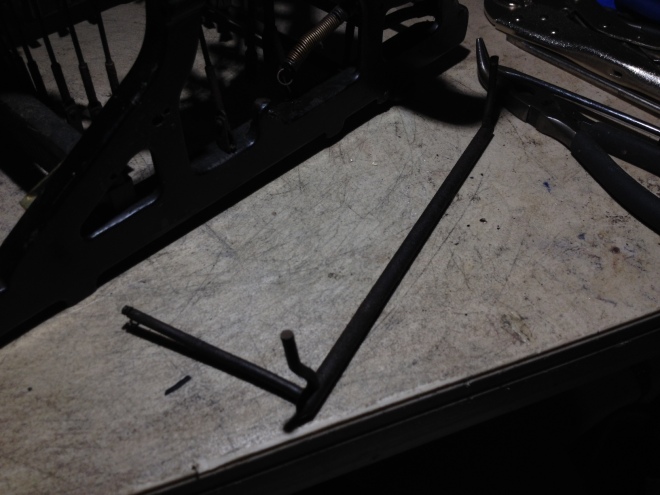
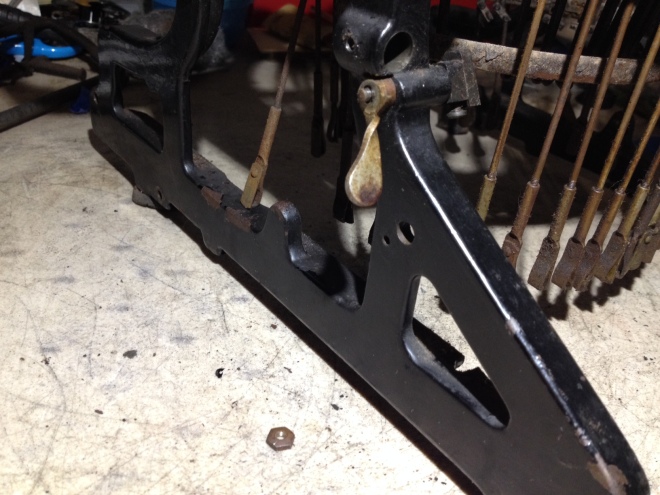
You can now remove the rod.
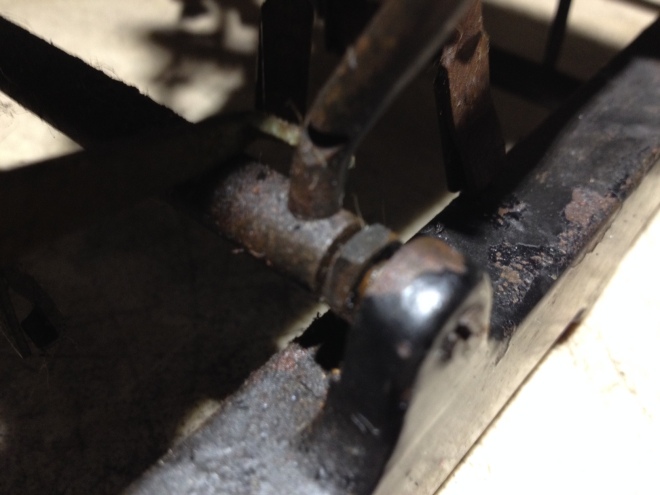
Loosen the nut then remove both nut and screw.
Remove the ribbon oscillator.
Hold on to the rectangular nut and remove the screw holding the escapement link to the U bar.
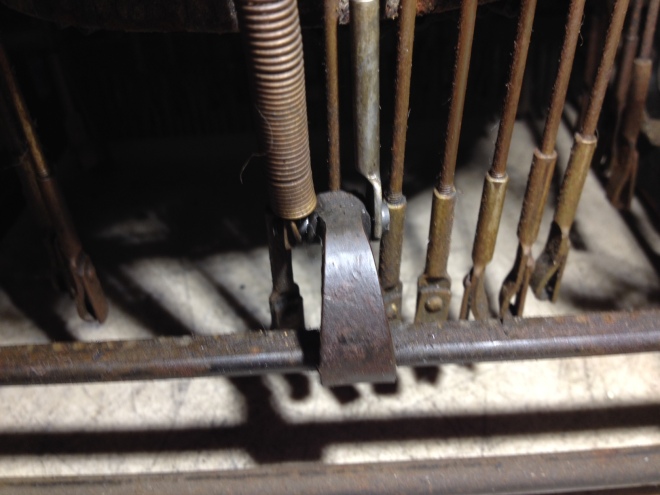
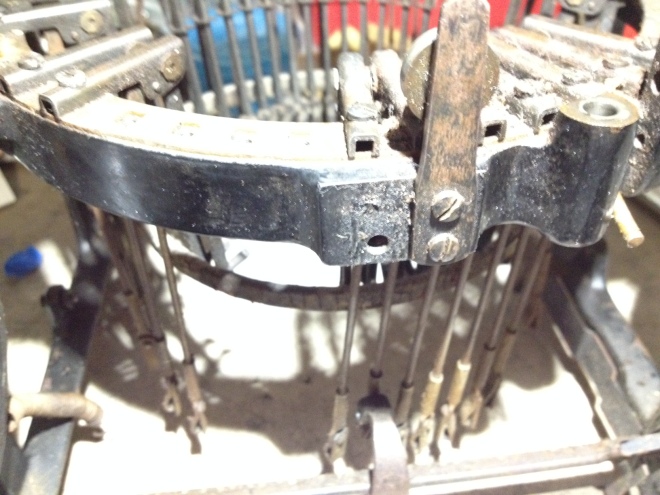
Remove the small setscrew mounted to the escapement pivot point. Disconnect the spring from the escapement.
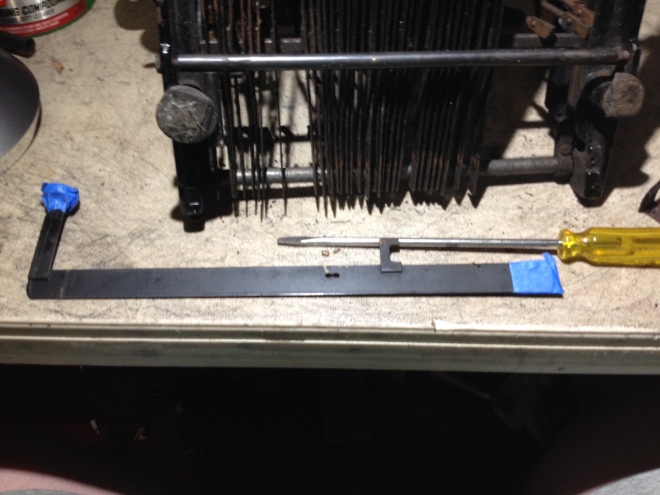
Loosen this screw. and slide the escapement adjuster over to the right.Pull the escapement out.
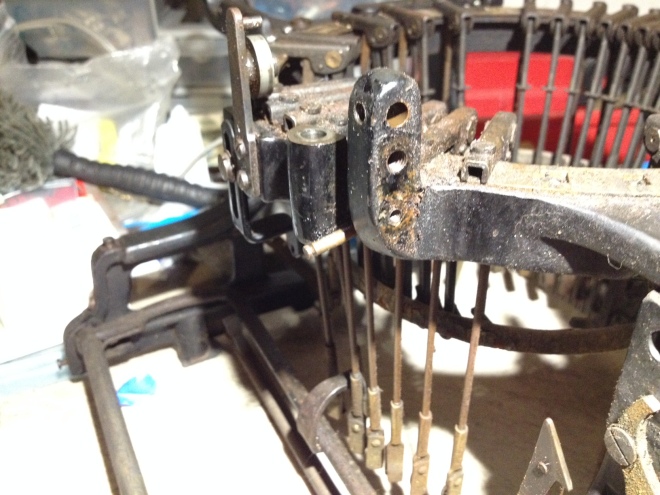
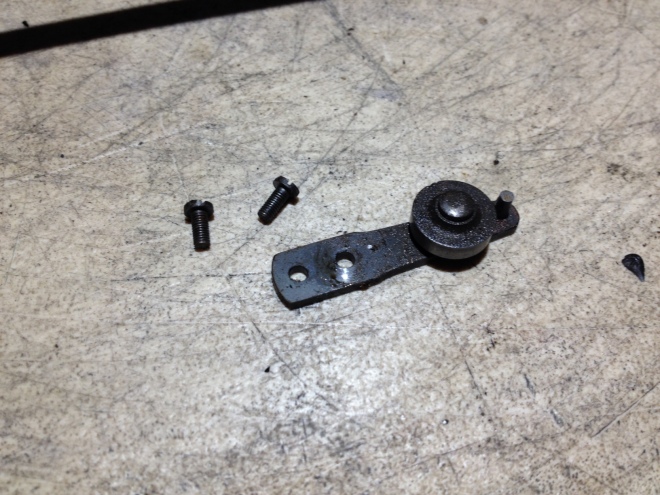
On the vertical part with 2 holes is 3 parts held in by a big screw. Remove the big screw and both parts. Sorry but I forgot to take a picture of this part.
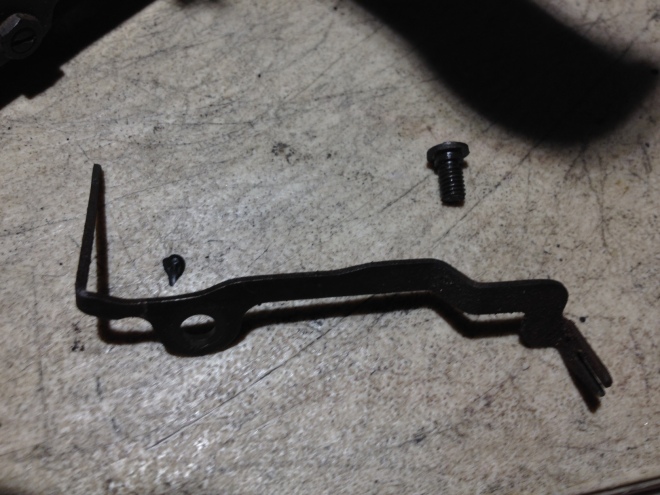
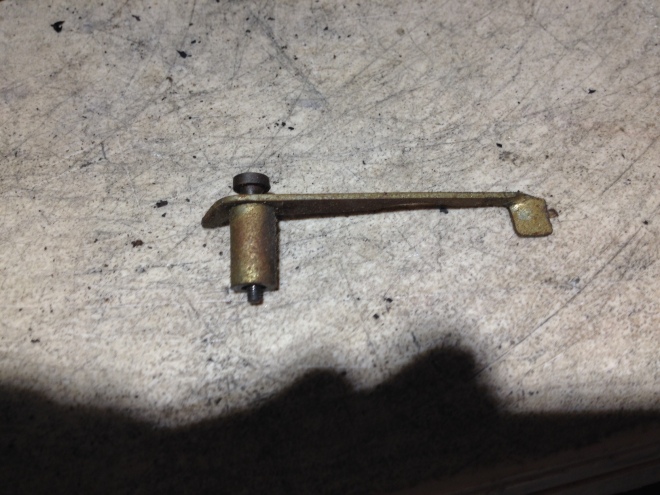
This part comes off first
then these 2 parts. The small screw holds them together.

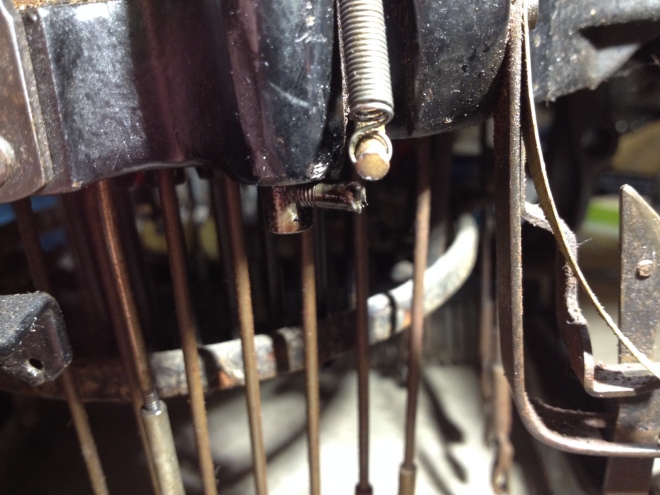
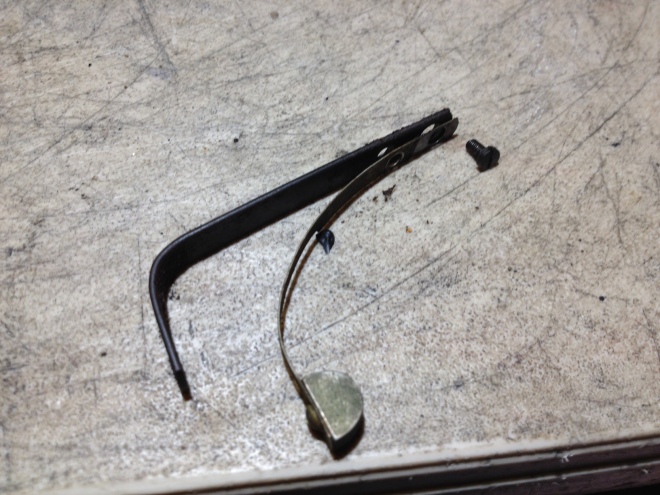
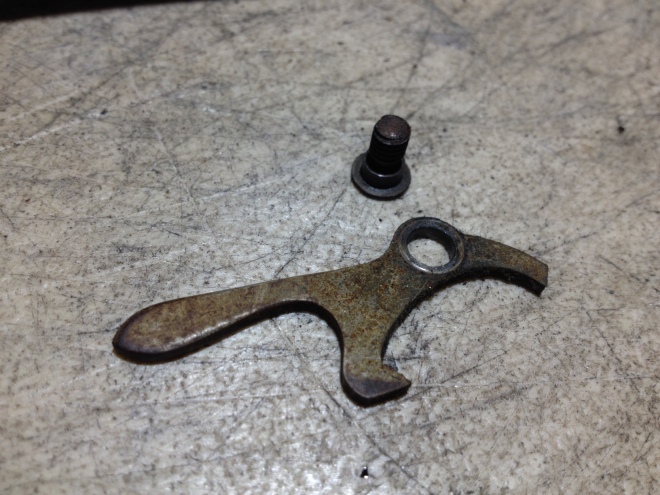
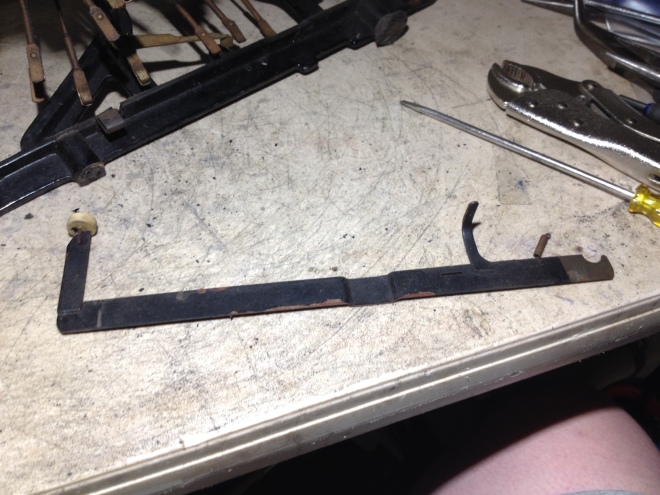
Remove this part and if you have not already the spring that it connects too. It mounts here
Next unmount the rear carriage bearing beside it.
Take off the mainspring ratchet release.

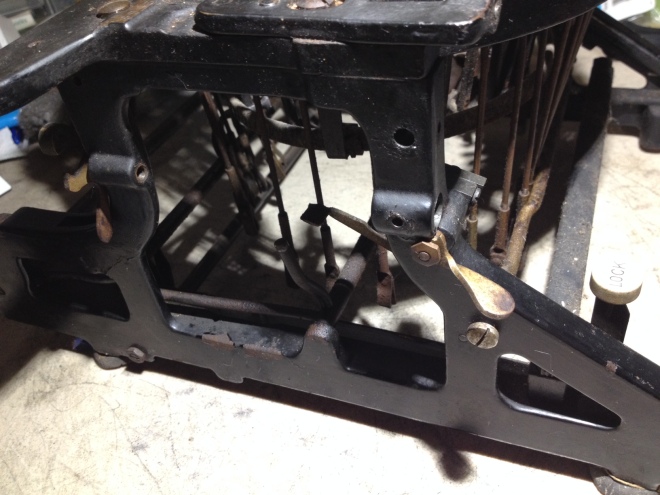
Take out the screw on either side of the pivot point of the U bar.
Remove the U bar.
Take out this screw. It connects to the line lock (I think thats what it is) I think there is also a screw on the other side.
 Unscrew the setscrew on the nut on both sides holding in the keylever comb. Then undo the screws from the bottom. You should be able to remove the keylever comb.
Take out the bigger screw. Its for the key comb. (you can also remove the other screw but mine is frozen in place)
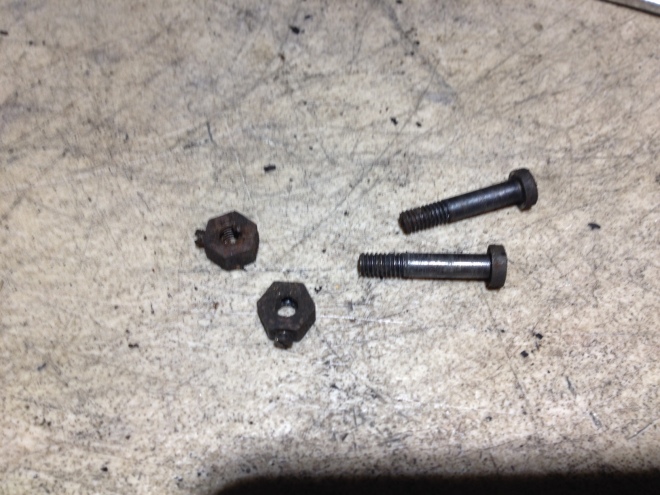
These are the parts that need removed.
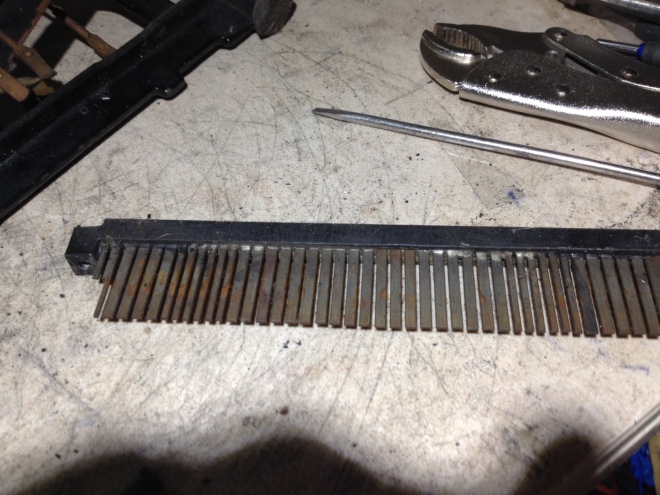
You should now be able to remove the key comb.
At this point you can finally remove the line lock key. (some machines do not have a lock key).
Remove the ribbon advance levers from both sides.
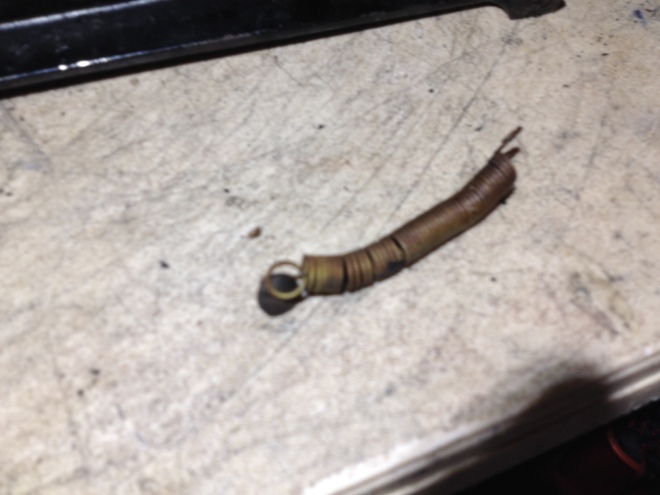
Remove the screw holding in this spring. It goes here.
Undo this nut on the shift lock.
Pull out the shift lock form the other side. Warning there is a spring inside the shift lock mechanism.
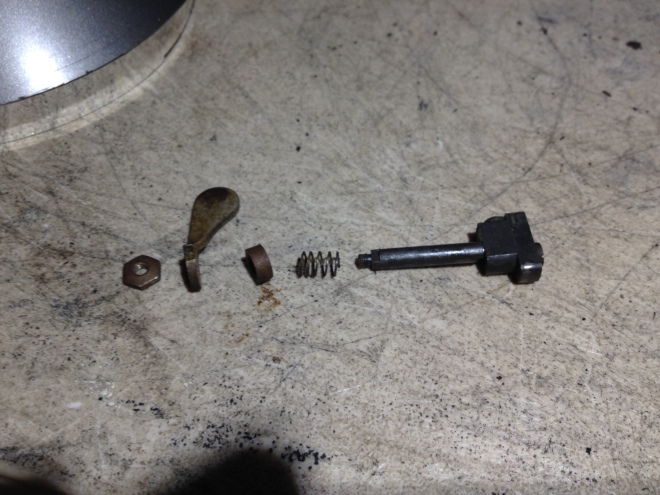
Here is how it goes.
At this point you can now remove all the typebars and the alignment plate. You are then done. The top deck can come off too but the screws are rusted solid on mine. Right now most of the parts I removed are soaking in Evaporust in preparation for plating or paint.
I plan to have the frame bead blasted at some point. I may have to wait for warm weather first though. Then I can paint the frame.
I bought a Densmore 1 at Herman’s from Greg Fudacz.
This typewriter came to me in a nonfunctional state with several frozen parts. I tried to get it working at Herman’s to no avail. When I got back I got to work getting it working. I had to take the entire escapement off of a parts machine to replace the one it came with. The part had been frozen for so long in such a way that a spring had become weak that did not allow it to function properly. Anyway I was able to get the machine to work somewhat. After playing with it for awhile I decided to take it apart and begin restoring it. Thus I present the:
Densmore Disassembly guide. Part 1
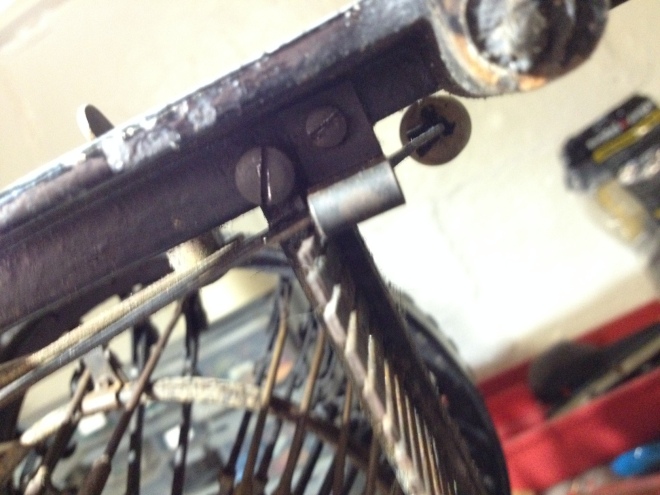
The first thing you want to do is remove this screw and the corresponding one on the other side of the typewriter. (screw is removed in photo) This holds on the rear key comb.

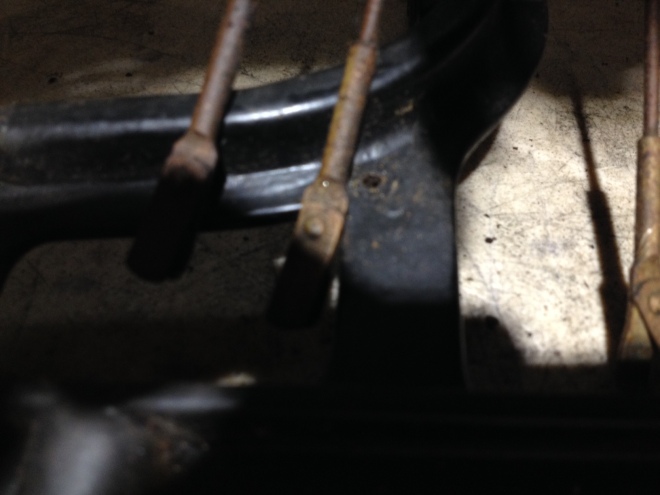
Once that is removed we can start removing the springs from the back panel.

All of these must come off of this part. I was able to pop them off with a screwdriver. Once that was done remover the back panel with its 6 screws and set it aside. Place the screws in a baggie or screw them back onto the frame.
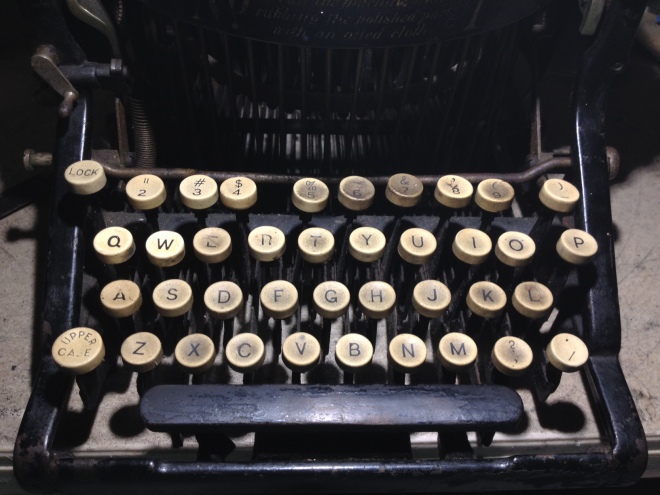
I took a good photo of the keyboard for reference. You need to know how to put it back together. They key are indeed whiter in this photo then in the photo at the top of this page. I used a magic eraser to whiten them. The ;/: key is missing though on my machine. I will replace it later.
Once all the springs and the back panel are off it should look like this.
Here we have one of the keylevers taken out of the machine masked off for painting. To remove a keylever from the machine unhook the typebar hanger from the keylever with a small screwdriver. They are held on with clasps that can be popped off. then take the back of the lever from the long rod in the back of the machine. You should then be able to lift the lever out of the machine from the bottom pulling forward and out, making sure to clear the universal bar. Repeat for all letter keys and the shift key. The shift key has a linkage riveted to it. You unhook the shift spring and take the linkage off of the carriage rail. 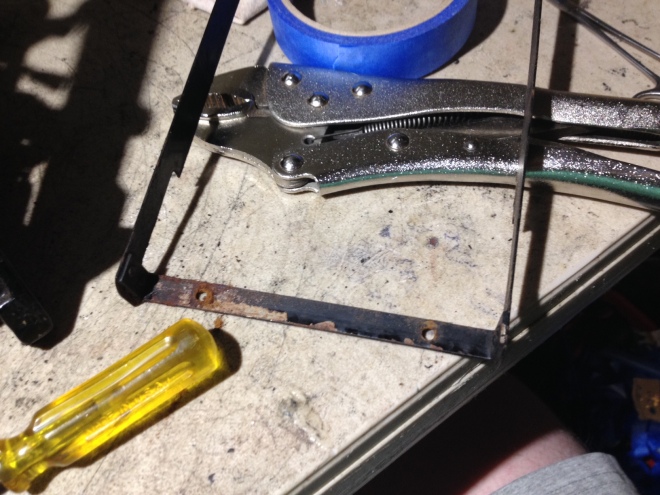
In with the keys is the space bar. It has nothing attached to it but you may have to fiddle with it to get it out. (the actual wood space bar is removed in the photo).
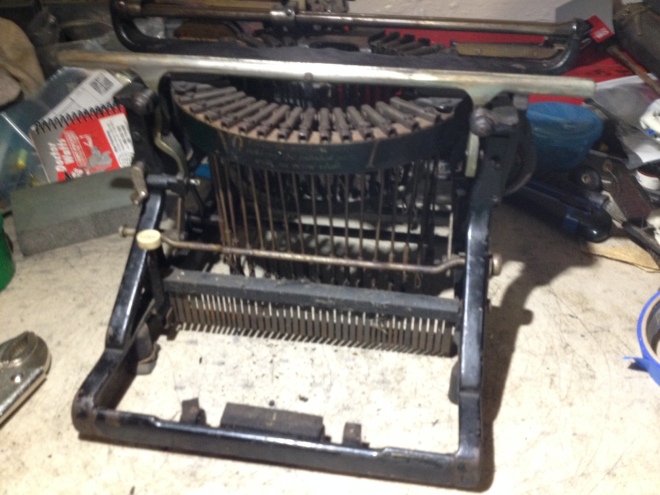
The machine should look like this at this point.
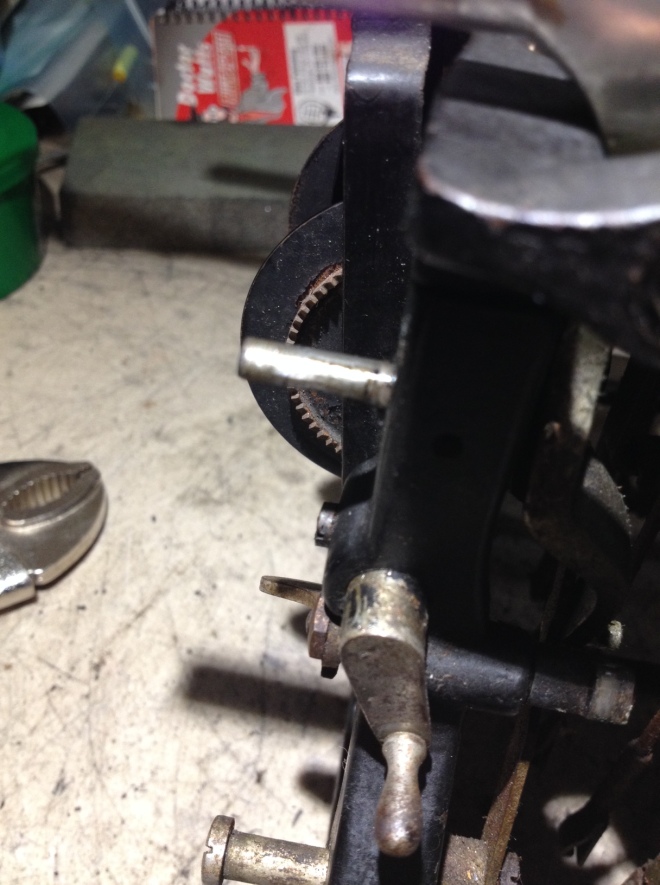
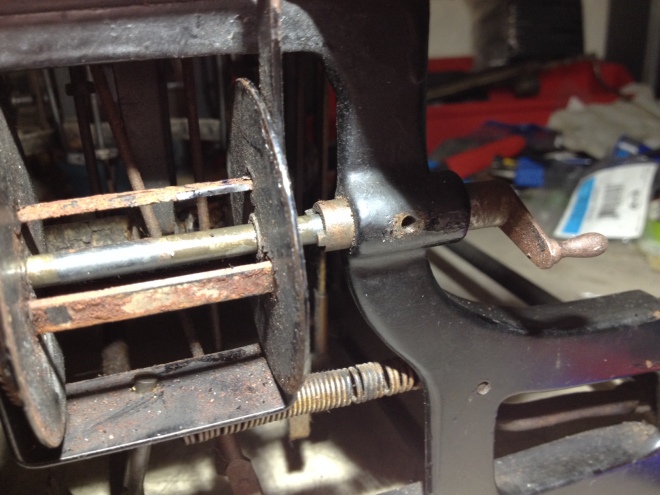
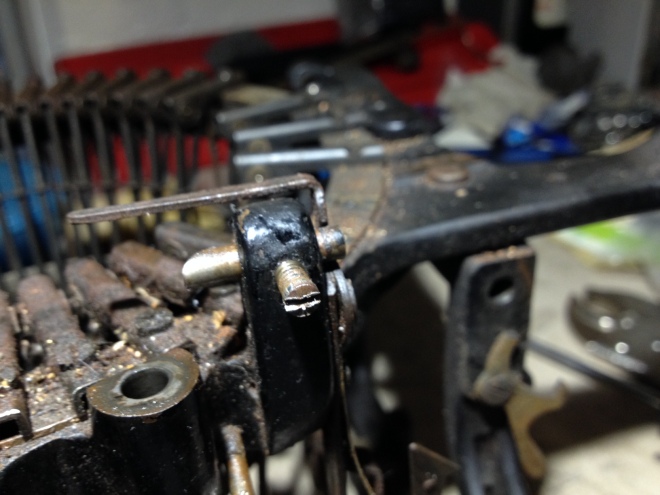
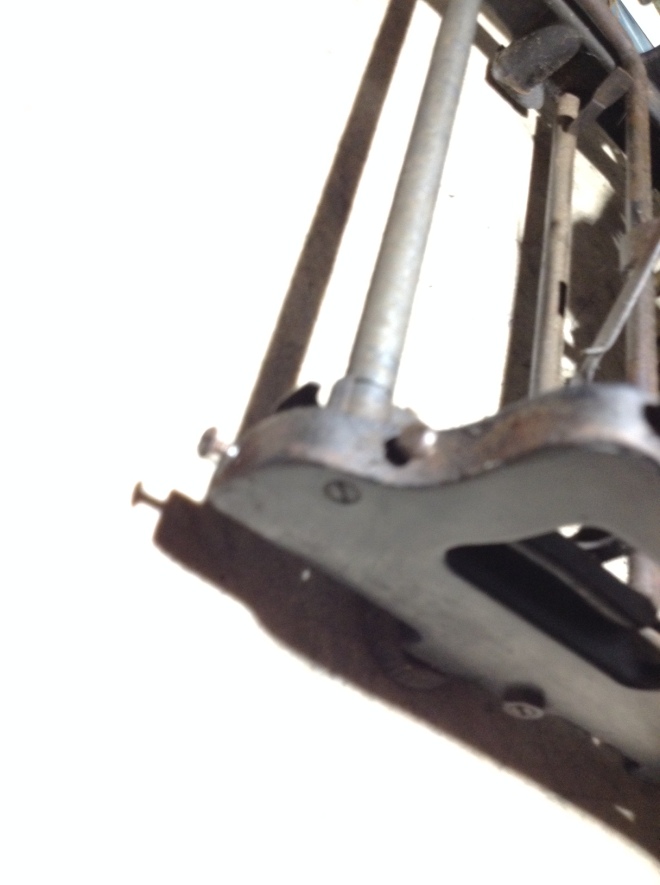
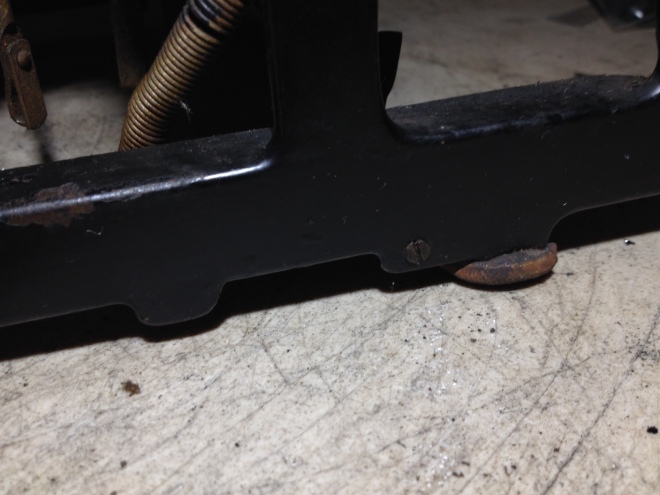
Unscrew the screw holding this pin in on the side of the machine. (the screw goes in the small hole above the ribbon crank) Take a screwdriver and tap it out if need be. Repeat for the other side. 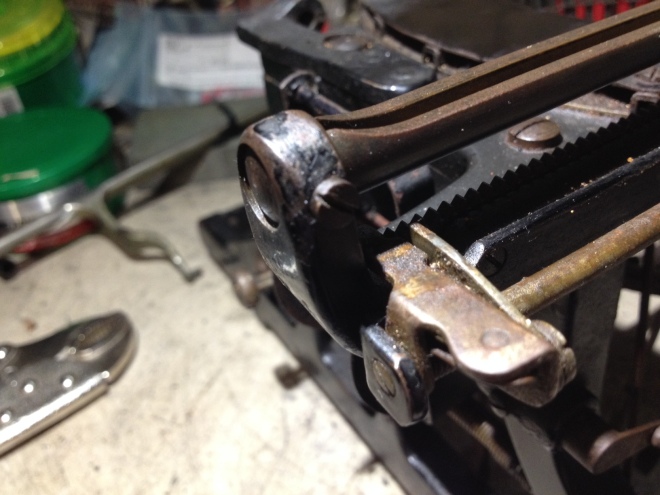
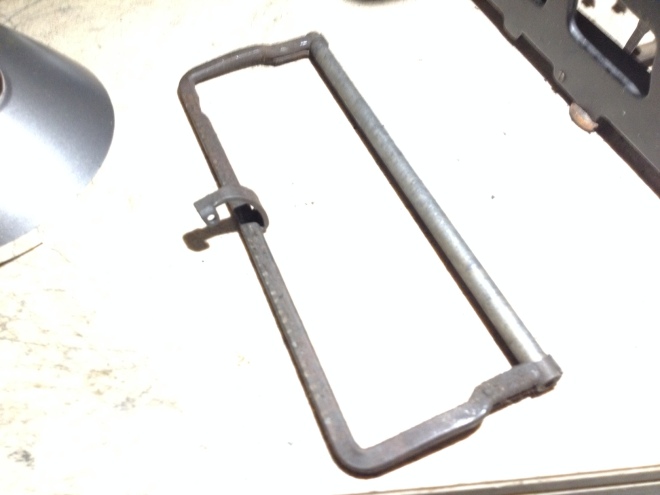
Wind down the mainspring. Remove this screw to allow the rear carriage rail to be removed. Pull it off to the side where you removed the screw. The carriage frame that is mounted to it will then lift off. You may have to press down on the U bar to let it clear the escapement. Disconnect the drawband.
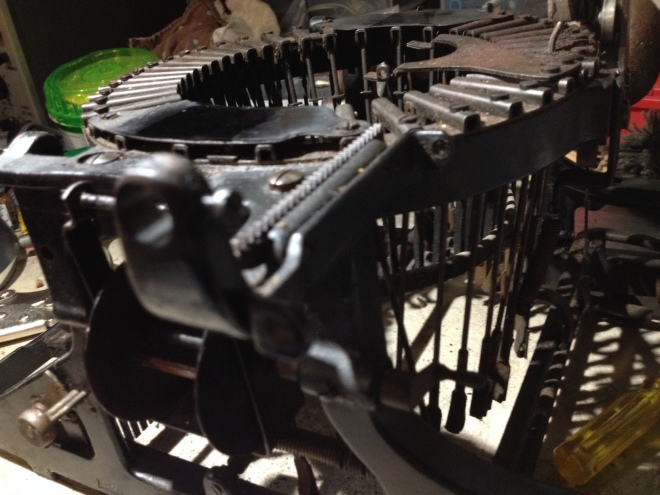
The machine should look like this at this point.
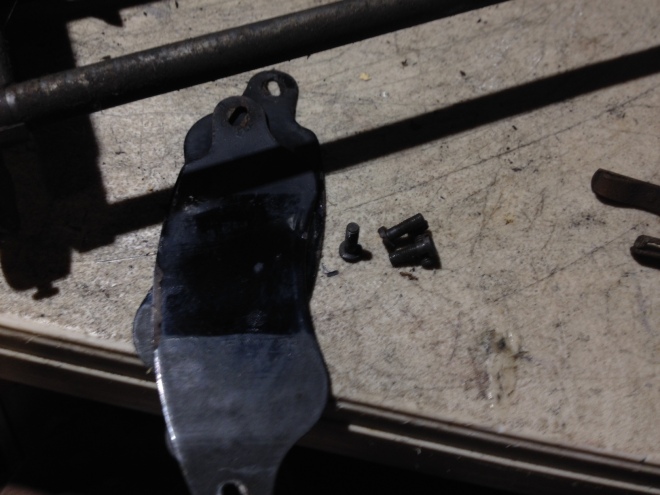
Remove the 2 plates on the top of the machine. Again make sure to put the screws somewhere where they will not get lost.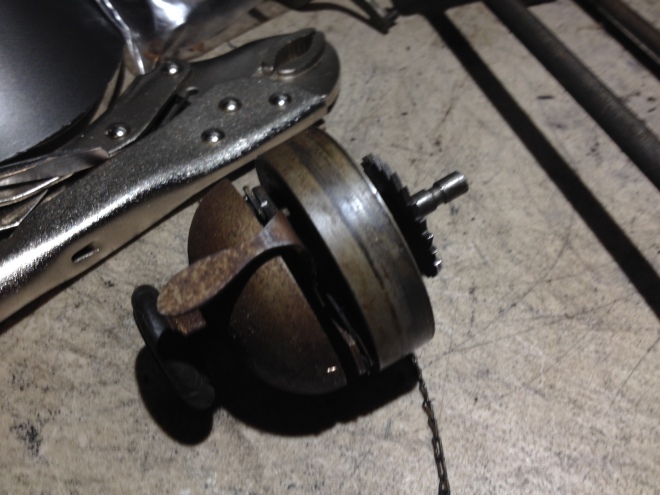
Take off the bell/mainspring assembly. There is a screw on the frame near the mainspring wind down ratchet that allows it to pull right off. Make sure to disconnect the small chain from the assembly. It attaches to the ribbon oscillator.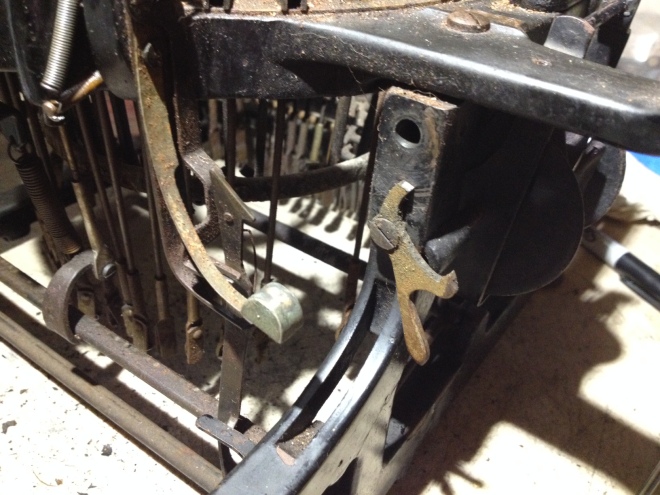
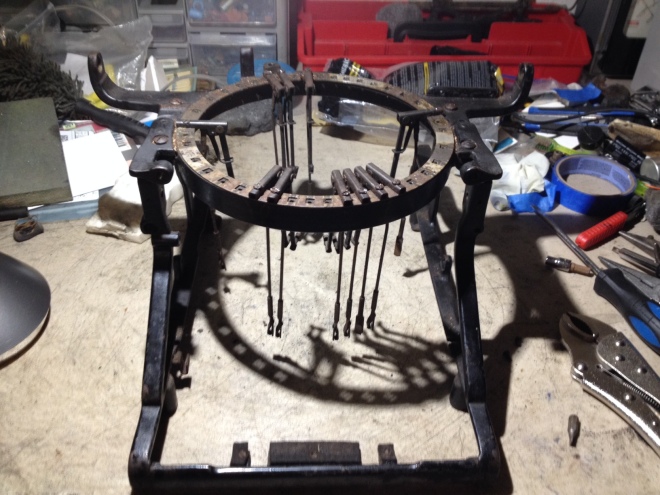
The machine without it on.
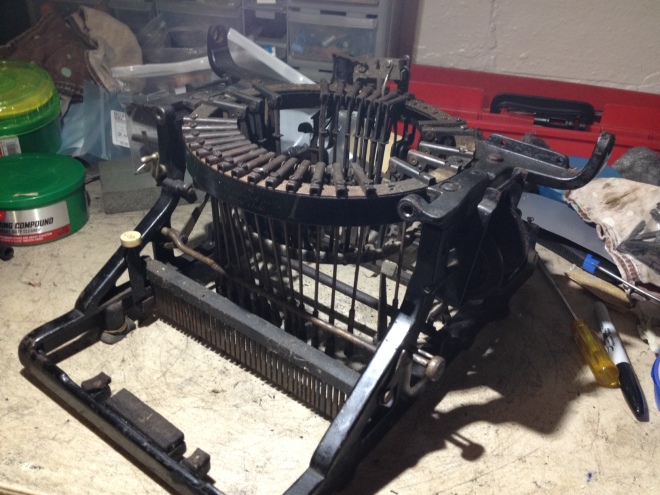
After all the steps have been followed this should be the result. More in the next installment. The Crown Prince Of Corrosion is on its way to becoming new again.
I am leaving for Herman’s
Stay tuned.
Its officially one week away from Herman’s. That means I am making the final preparations typewriter wise. The final list of machines leaving the collection is below.
The following machines are coming back with me.
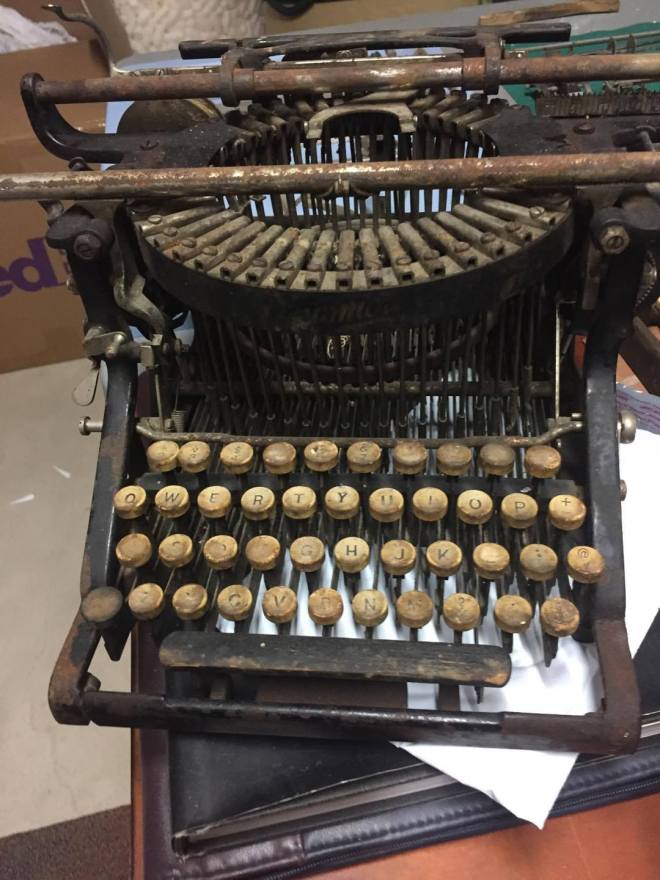
New Century Caligraph No. 5.
I have also ordered some wide ribbons for the SP2, SP5, Densmore 1, Remington 7. They arrived today. I will be taking the wide ribbon along as well.
Lastly I have a message for Richard Polt
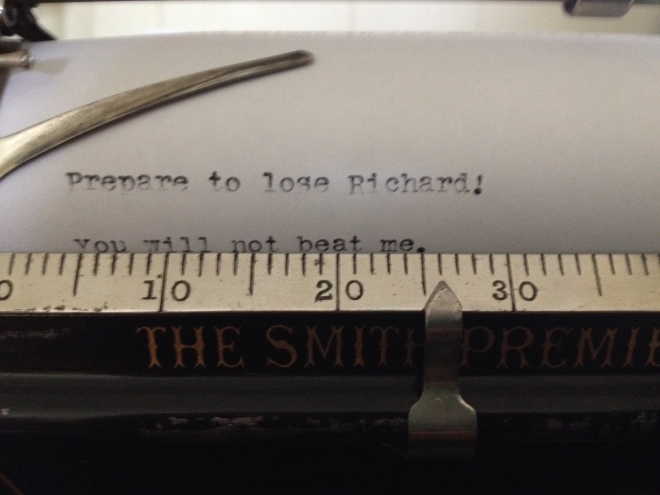
There will be 2 categories in the typing contest at Herman’s. Modern machines and antiques. I will be in the antique category. I will be using either the SP5, Caligraph 5 or Densmore 1.
I got more typewriters to repair when I brought back the last batch.
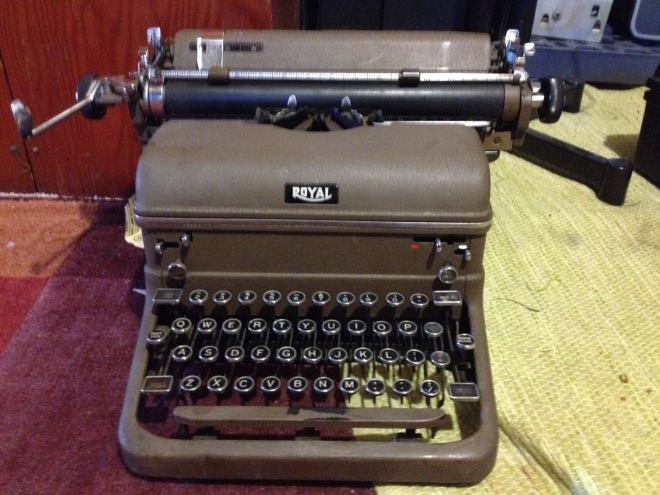
First up is this 1953 Royal HH SN# HHE4995619. It needed a ribbon and some work to the Magic Margin system.
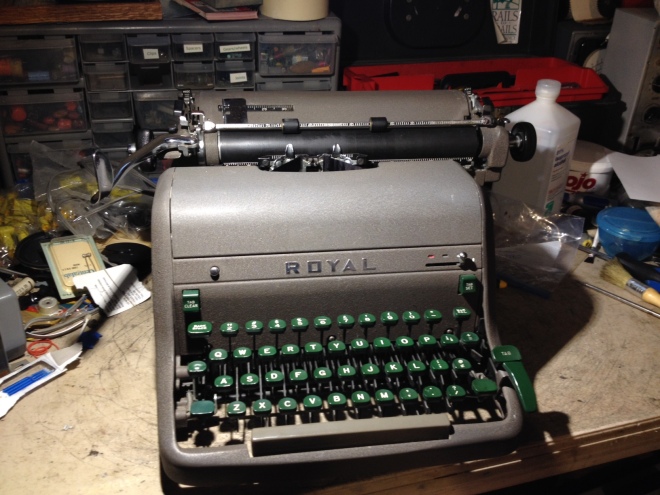
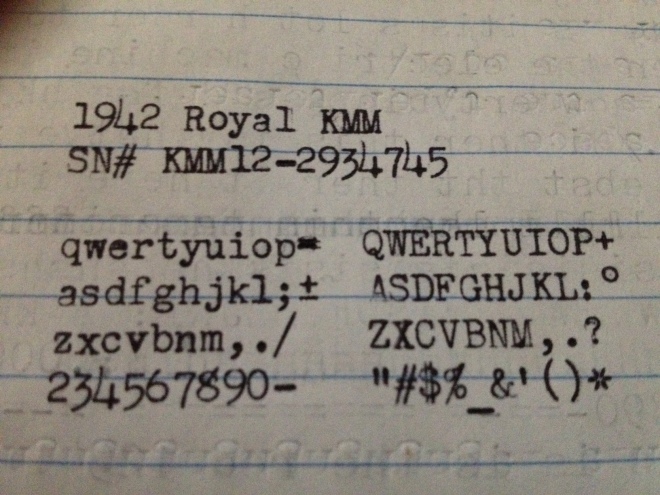
The other machine in for repairs is this Royal KMM from 1942 SN#KMM12-2934745
It has a keyboard with math symbols.
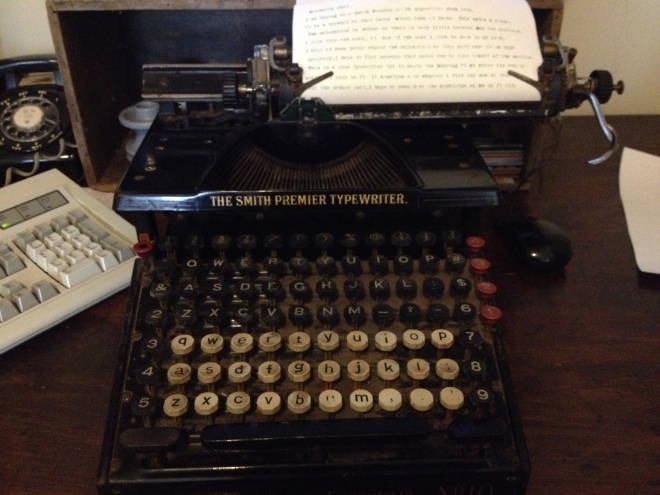
I decided to repaint the top deck of the Smith Premier 2. It had about 25-30% of the paint flaking off. I have repainted it with some gloss black lacquer. I also redid the pinstripes.
It is not perfect as I did not remove all of the old paint prior to doing this and the pinstripes could be better. I like it for the time being. I plan to have a lot of things beadblasted (for the Densmore) in the near future so I may redo it at that point.
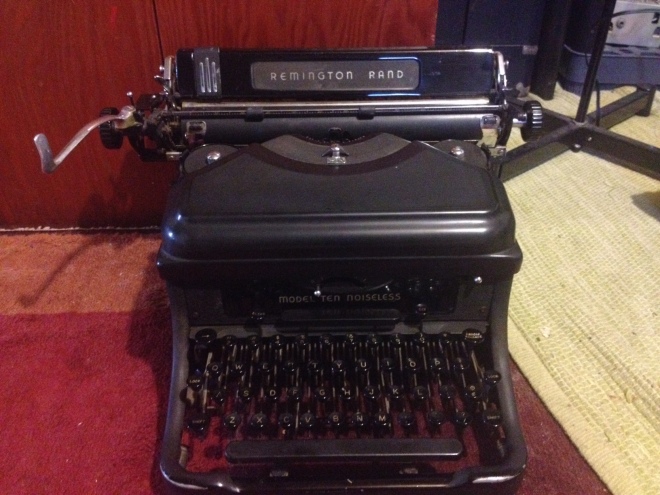
I have gotten some more machines from the local antique shop to repair. Up first is this Remington Noiseless 10 from 1941.
We then have the oldest of the machines (and older then most typewriters). A 1904 Underwood 4. This machine has a crinkle finish on the paper table and front plate as it was rebuilt at some point.

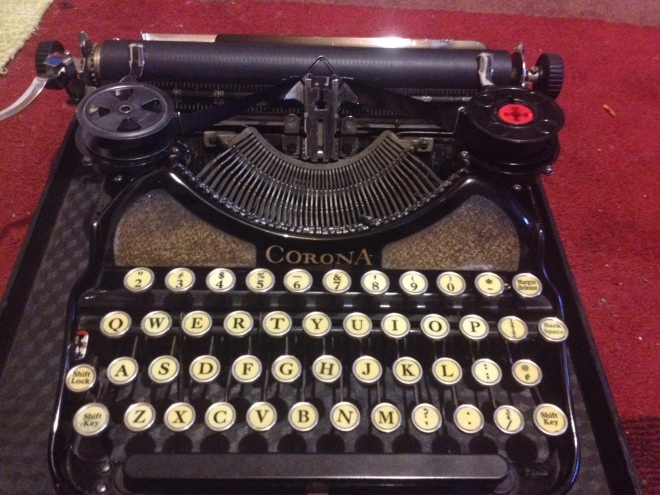
Next up is this wonderful little Corona 4 from 1929. I discovered that the front feed roller was missing! But thanks to a replacement part from Tom Furrier at Cambridge Typewriter I was able to get it working again.
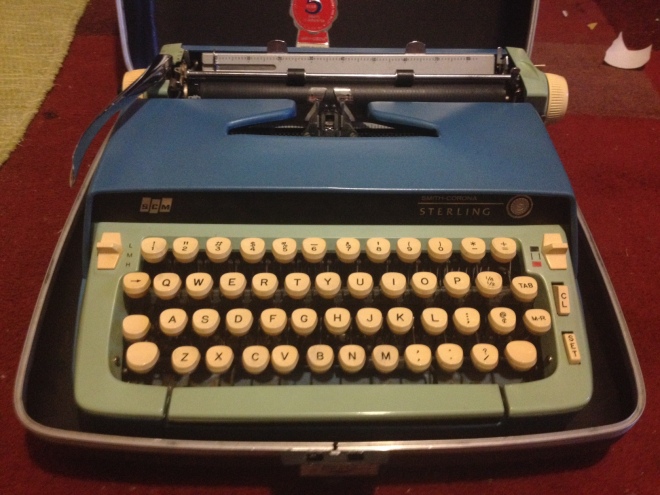
This 1973 Smith Corona Sterling did not need much work done to it.
Some of my typewriters are leaving the collection, Here is a list so far.
1897 Remington 6
1930 LC Smith 8
1961 Olympia SG1
1979 Wards Escort 550
These are all going to their new owners at Herman’s.
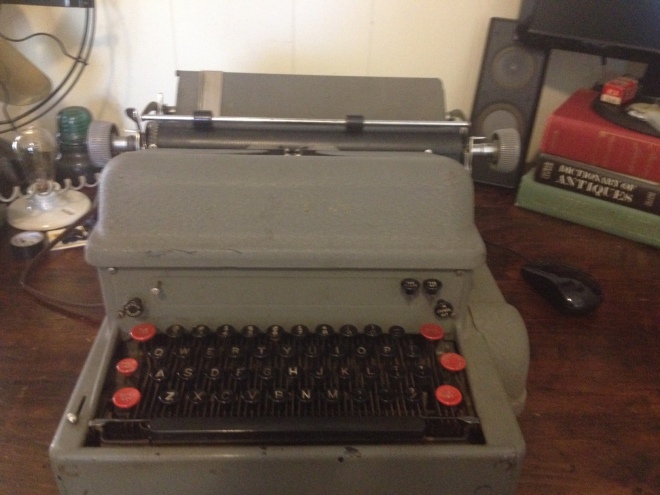
A few days ago I decided to get a machine up and running that I have got at Herman’s last year. My 1941 International (IBM) Electromatic. This machine had a few problems. The biggest one is that it would not type. Most of the keys created no impression and some did not activate at all. This was solved by adjusting the little rubber driveshaft between the motor and the machine. Another major issue was the return clutch would get stuck in the on position, jamming the machine. I fixed this by pounding the knockout toggle link back into the correct position. The Backspace and Tab did not work as well either. The clevises for both mechanism had come undone in the back of the machine. The machine is now working fine. It has a very strong impression. Having a hard platen is no help. Even on the weakest setting it is very powerful. It was rebuilt at some point in the 50s or 60s as it has grey paint and newer style grey knobs.
I call it Behemoth.
How would you go about cleaning all the gunk out of the key legends? They are quite dirty and I would like to make them legible again.
